HTTP Node
This guide will walk you through the process of creating a Command in FetchMedia using an n8n HTTP Request node.
Prerequisites
Before you start, you'll need:
-
A FetchMedia API Key. You can create one in your FetchMedia dashboard.
-
An n8n account. If you don't have one, you can sign up at n8n.io.
Step 1: Create a new n8n workflow
First, log in to your n8n account and create a new workflow.
Step 2: Add an HTTP Request node
In your new workflow, add an HTTP Request node. You can do this by clicking the + button and searching for "HTTP Request".
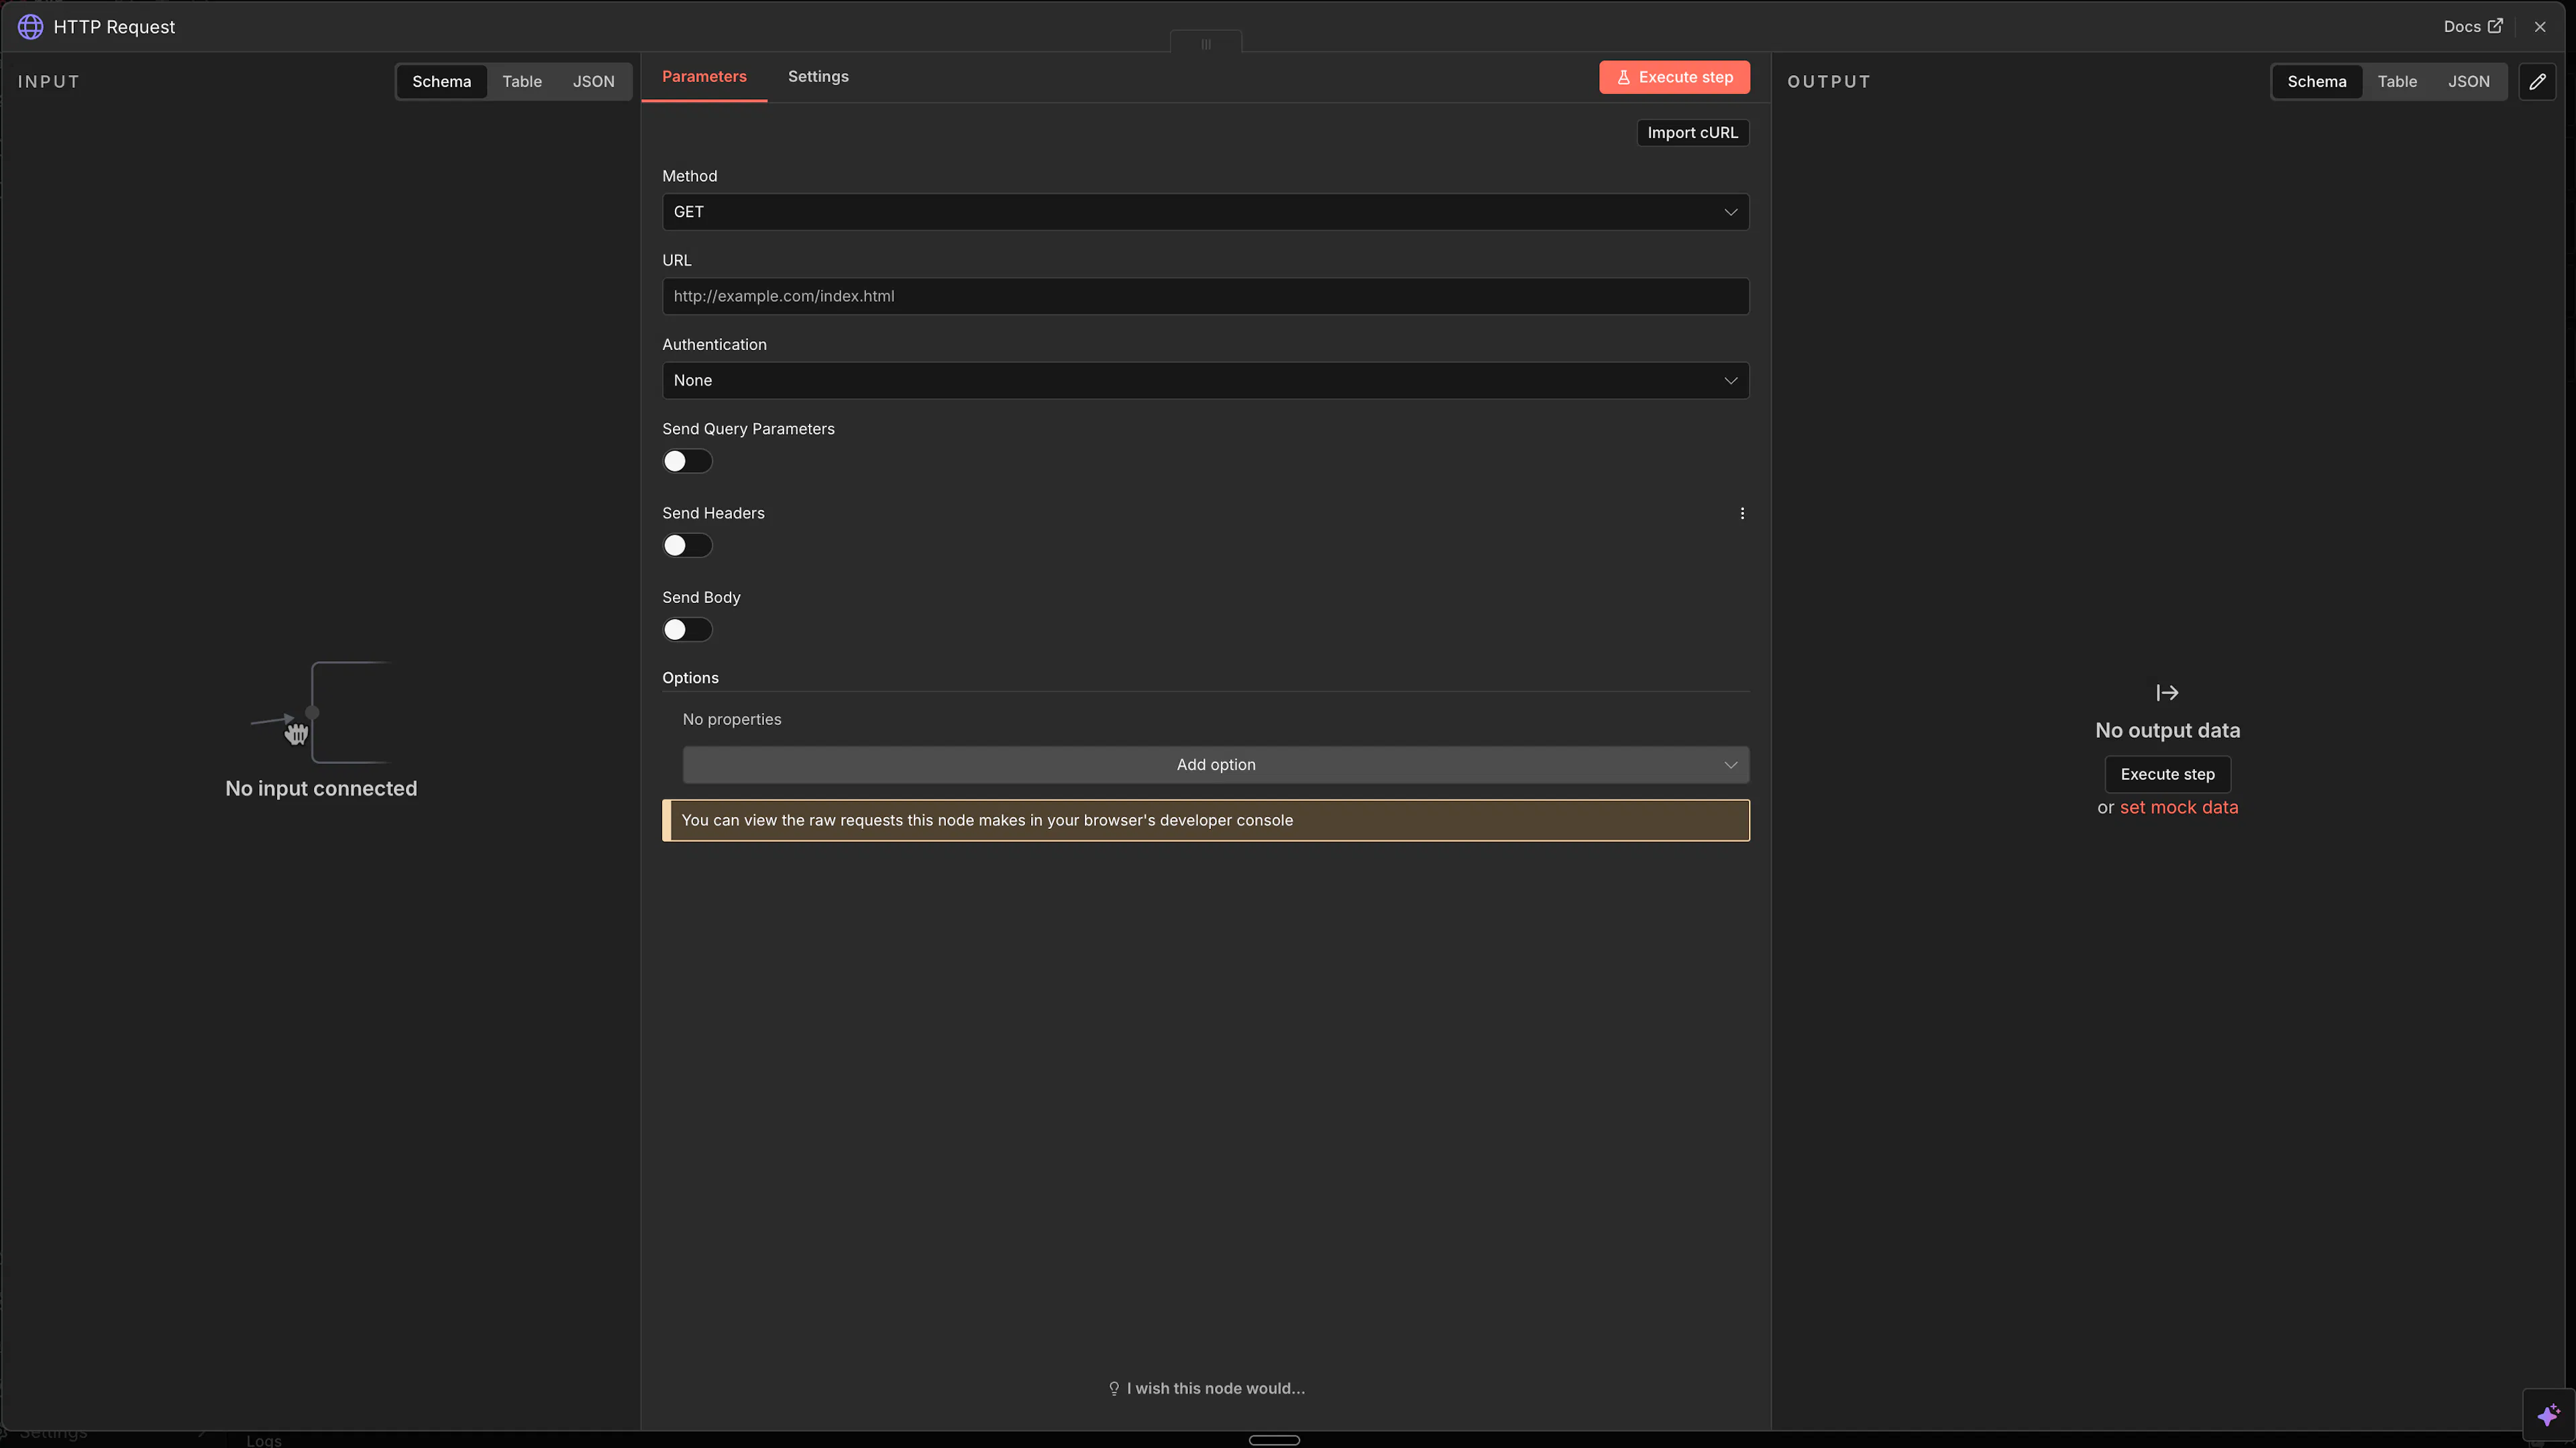
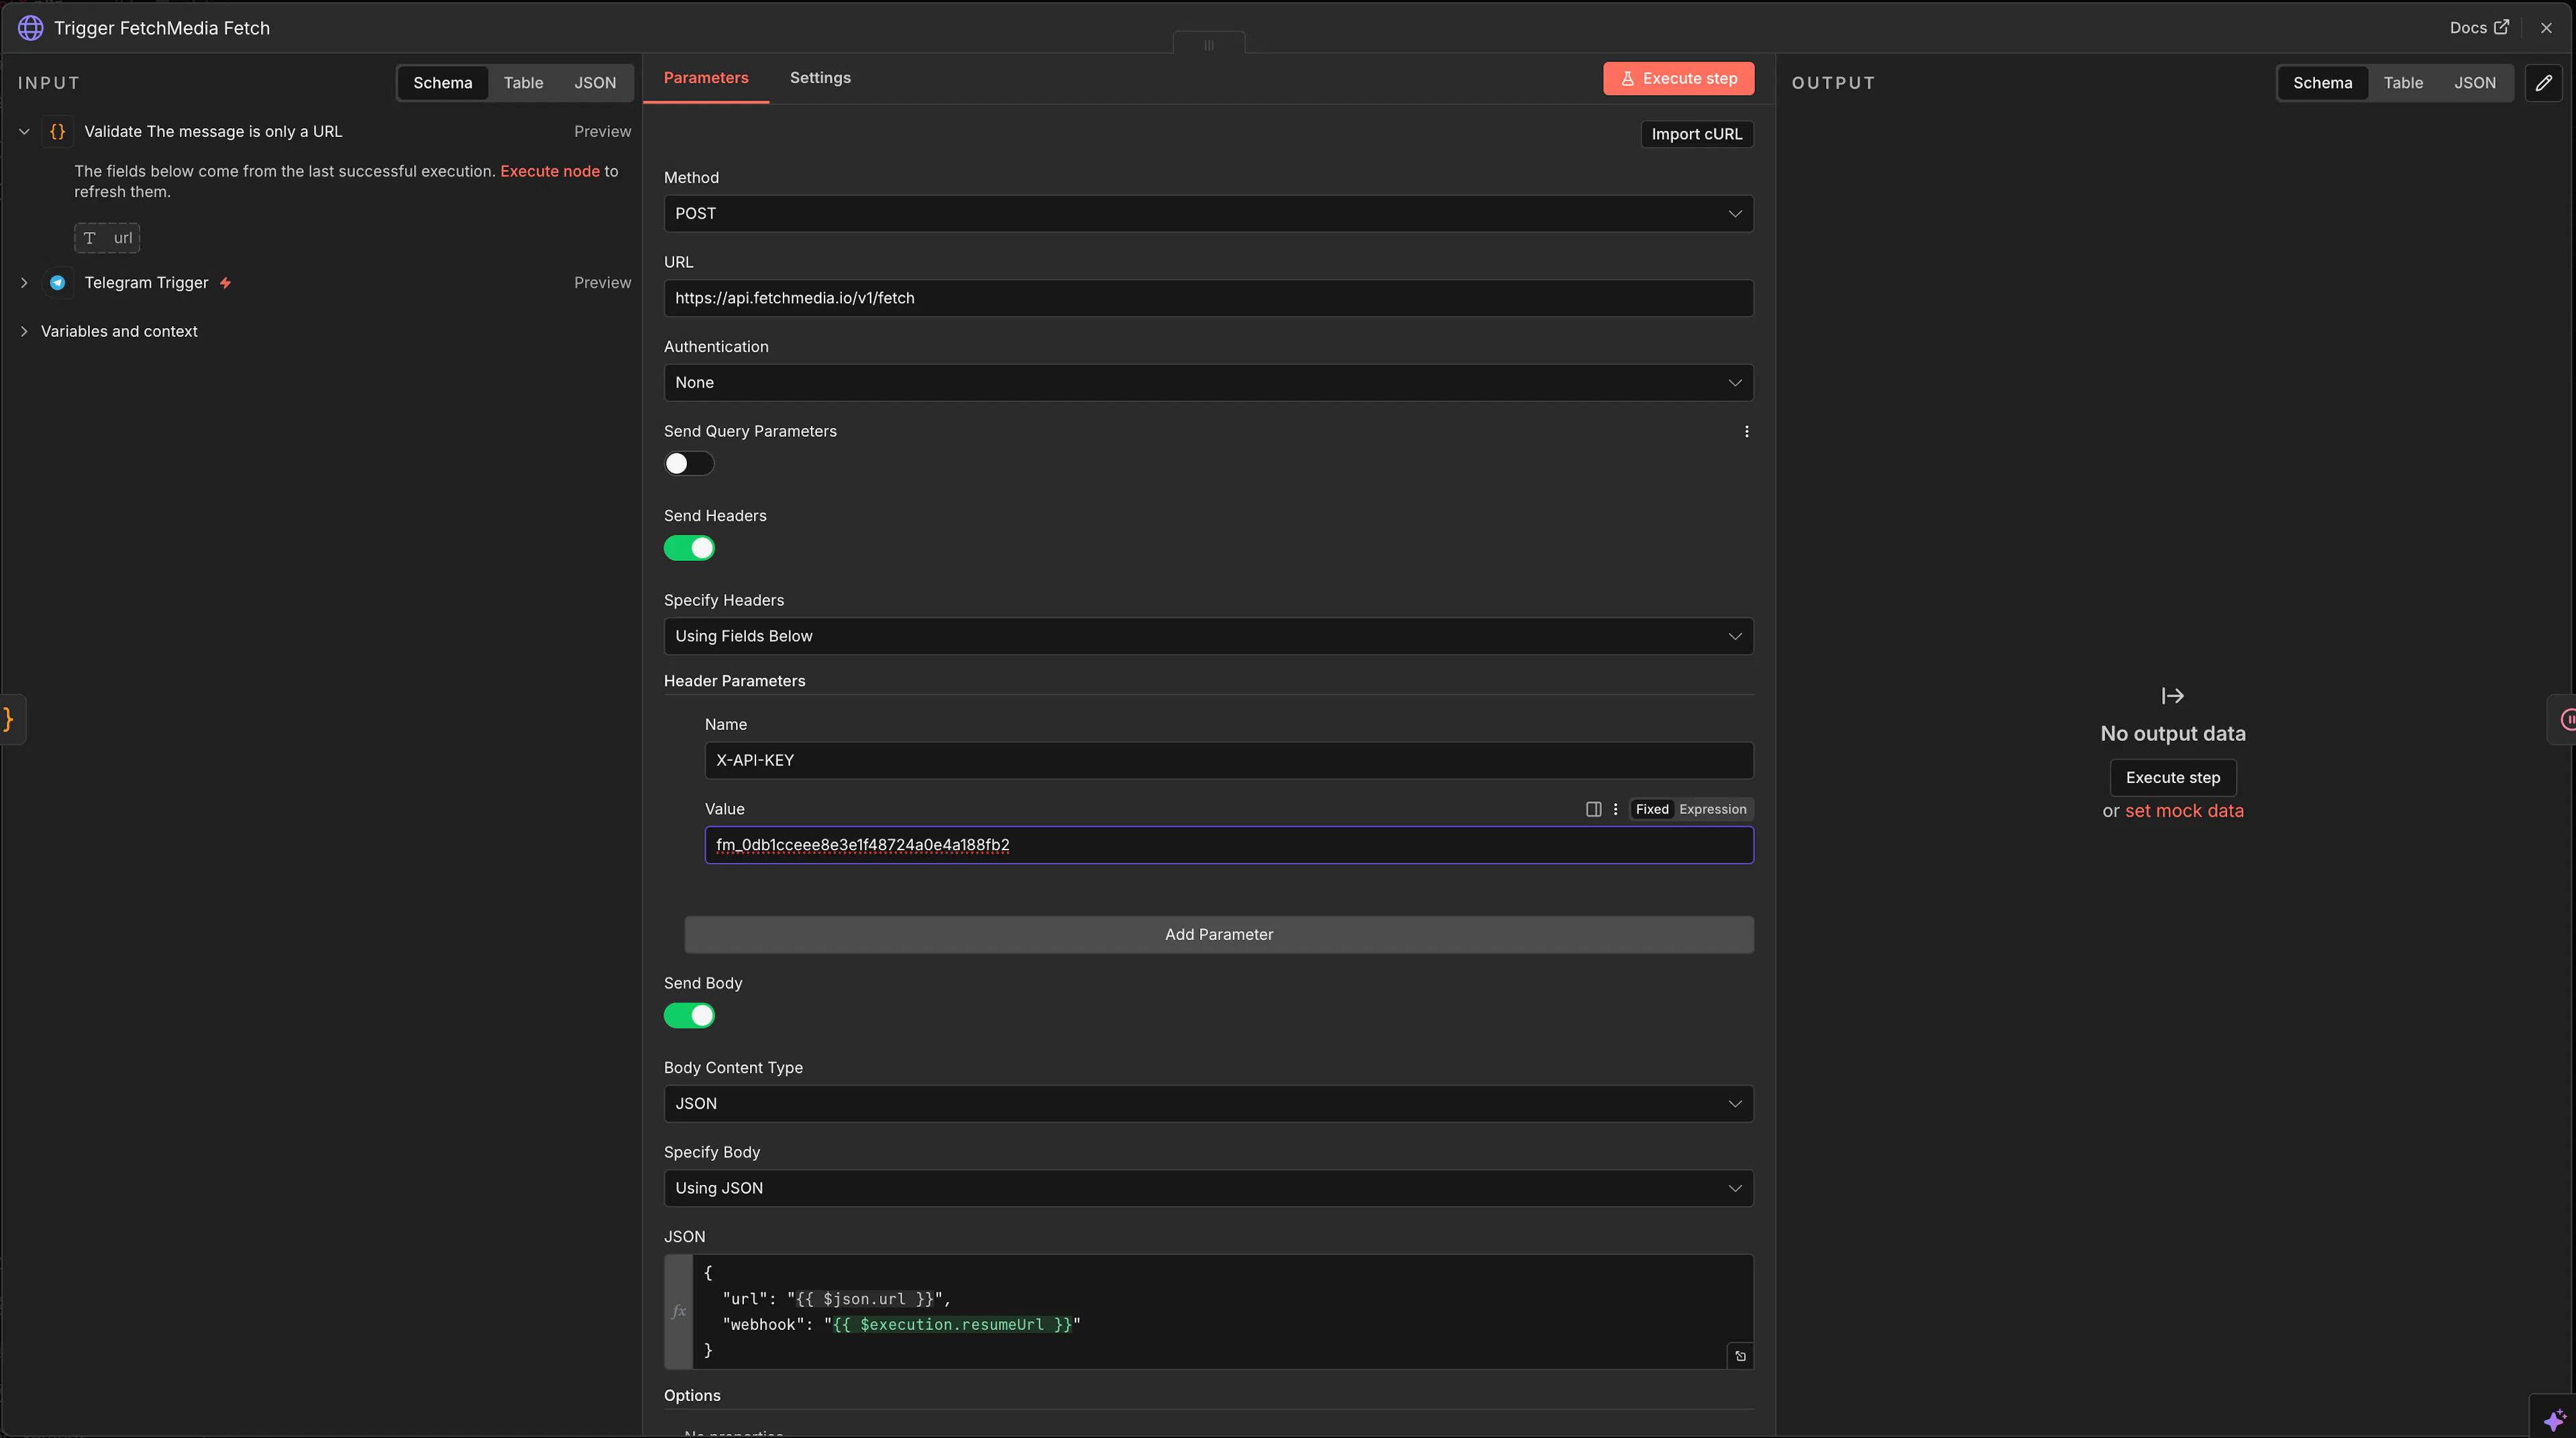
Step 3: Configure the HTTP Request node
Now, let's configure the HTTP Request node to send a request to the FetchMedia API.
-
Method:
POST -
URL:
https://api.fetchmedia.io/v1/fetch -
Authentication:
Header Auth
For Header Auth, you'll need to add a new credential.
-
Click on "Create New" next to the "Credentials" field.
-
Give your credential a name, like "FetchMedia API Key".
-
The "Name" of the header should be
X-API-KEY. -
The "Value" should be your FetchMedia API key.
-
Click "Save" to save your credentials.
Next, you'll need to configure the request body.
-
Send Body:
true -
Body Content Type:
JSON -
Body:
{
  "url": "https://www3.cde.ca.gov/download/rod/big_buck_bunny.mp4"
}
Step 4: Test the node
Once you've configured the node, you can test it by clicking the "Execute Node" button. If the request is successful, you should see a 201 status code and a JSON response containing the command_id.
Conclusion
That's it! You've successfully created a FetchMedia command using n8n. You can now connect this node to other nodes in your workflow to automate your media processing tasks. For more information on what you can do with commands, check out the Commands documentation.