Using Webhook Callbacks for Commands in n8n
This guide demonstrates how to use webhooks to get real-time status updates for your FetchMedia commands in n8n. Using webhooks is more efficient than polling, as FetchMedia will notify you instantly when a command is complete.
We will create two separate workflows:
-
Webhook Handler: A workflow that listens for incoming webhook calls from FetchMedia.
-
Command Creator: A workflow that sends the request to create a command, telling FetchMedia where to send the webhook.
Prerequisites
-
An n8n account.
-
A FetchMedia API Key.
-
A publicly accessible n8n instance. If you are using n8n's cloud version, your webhook URLs are already public. If you are self-hosting, you may need a tool like ngrok to expose your local n8n instance to the internet during testing.
Part 1: The Waiting Stage
The workflow adds a "wait" step to your n8n process, pausing execution until a specific webhook from FetchMedia is received.
Step 1: Create a Workflow with a Wait Node
-
Create a new, empty workflow in n8n.
-
Add a Wait node. This node will pause your workflow until it receives a specific signal.
-
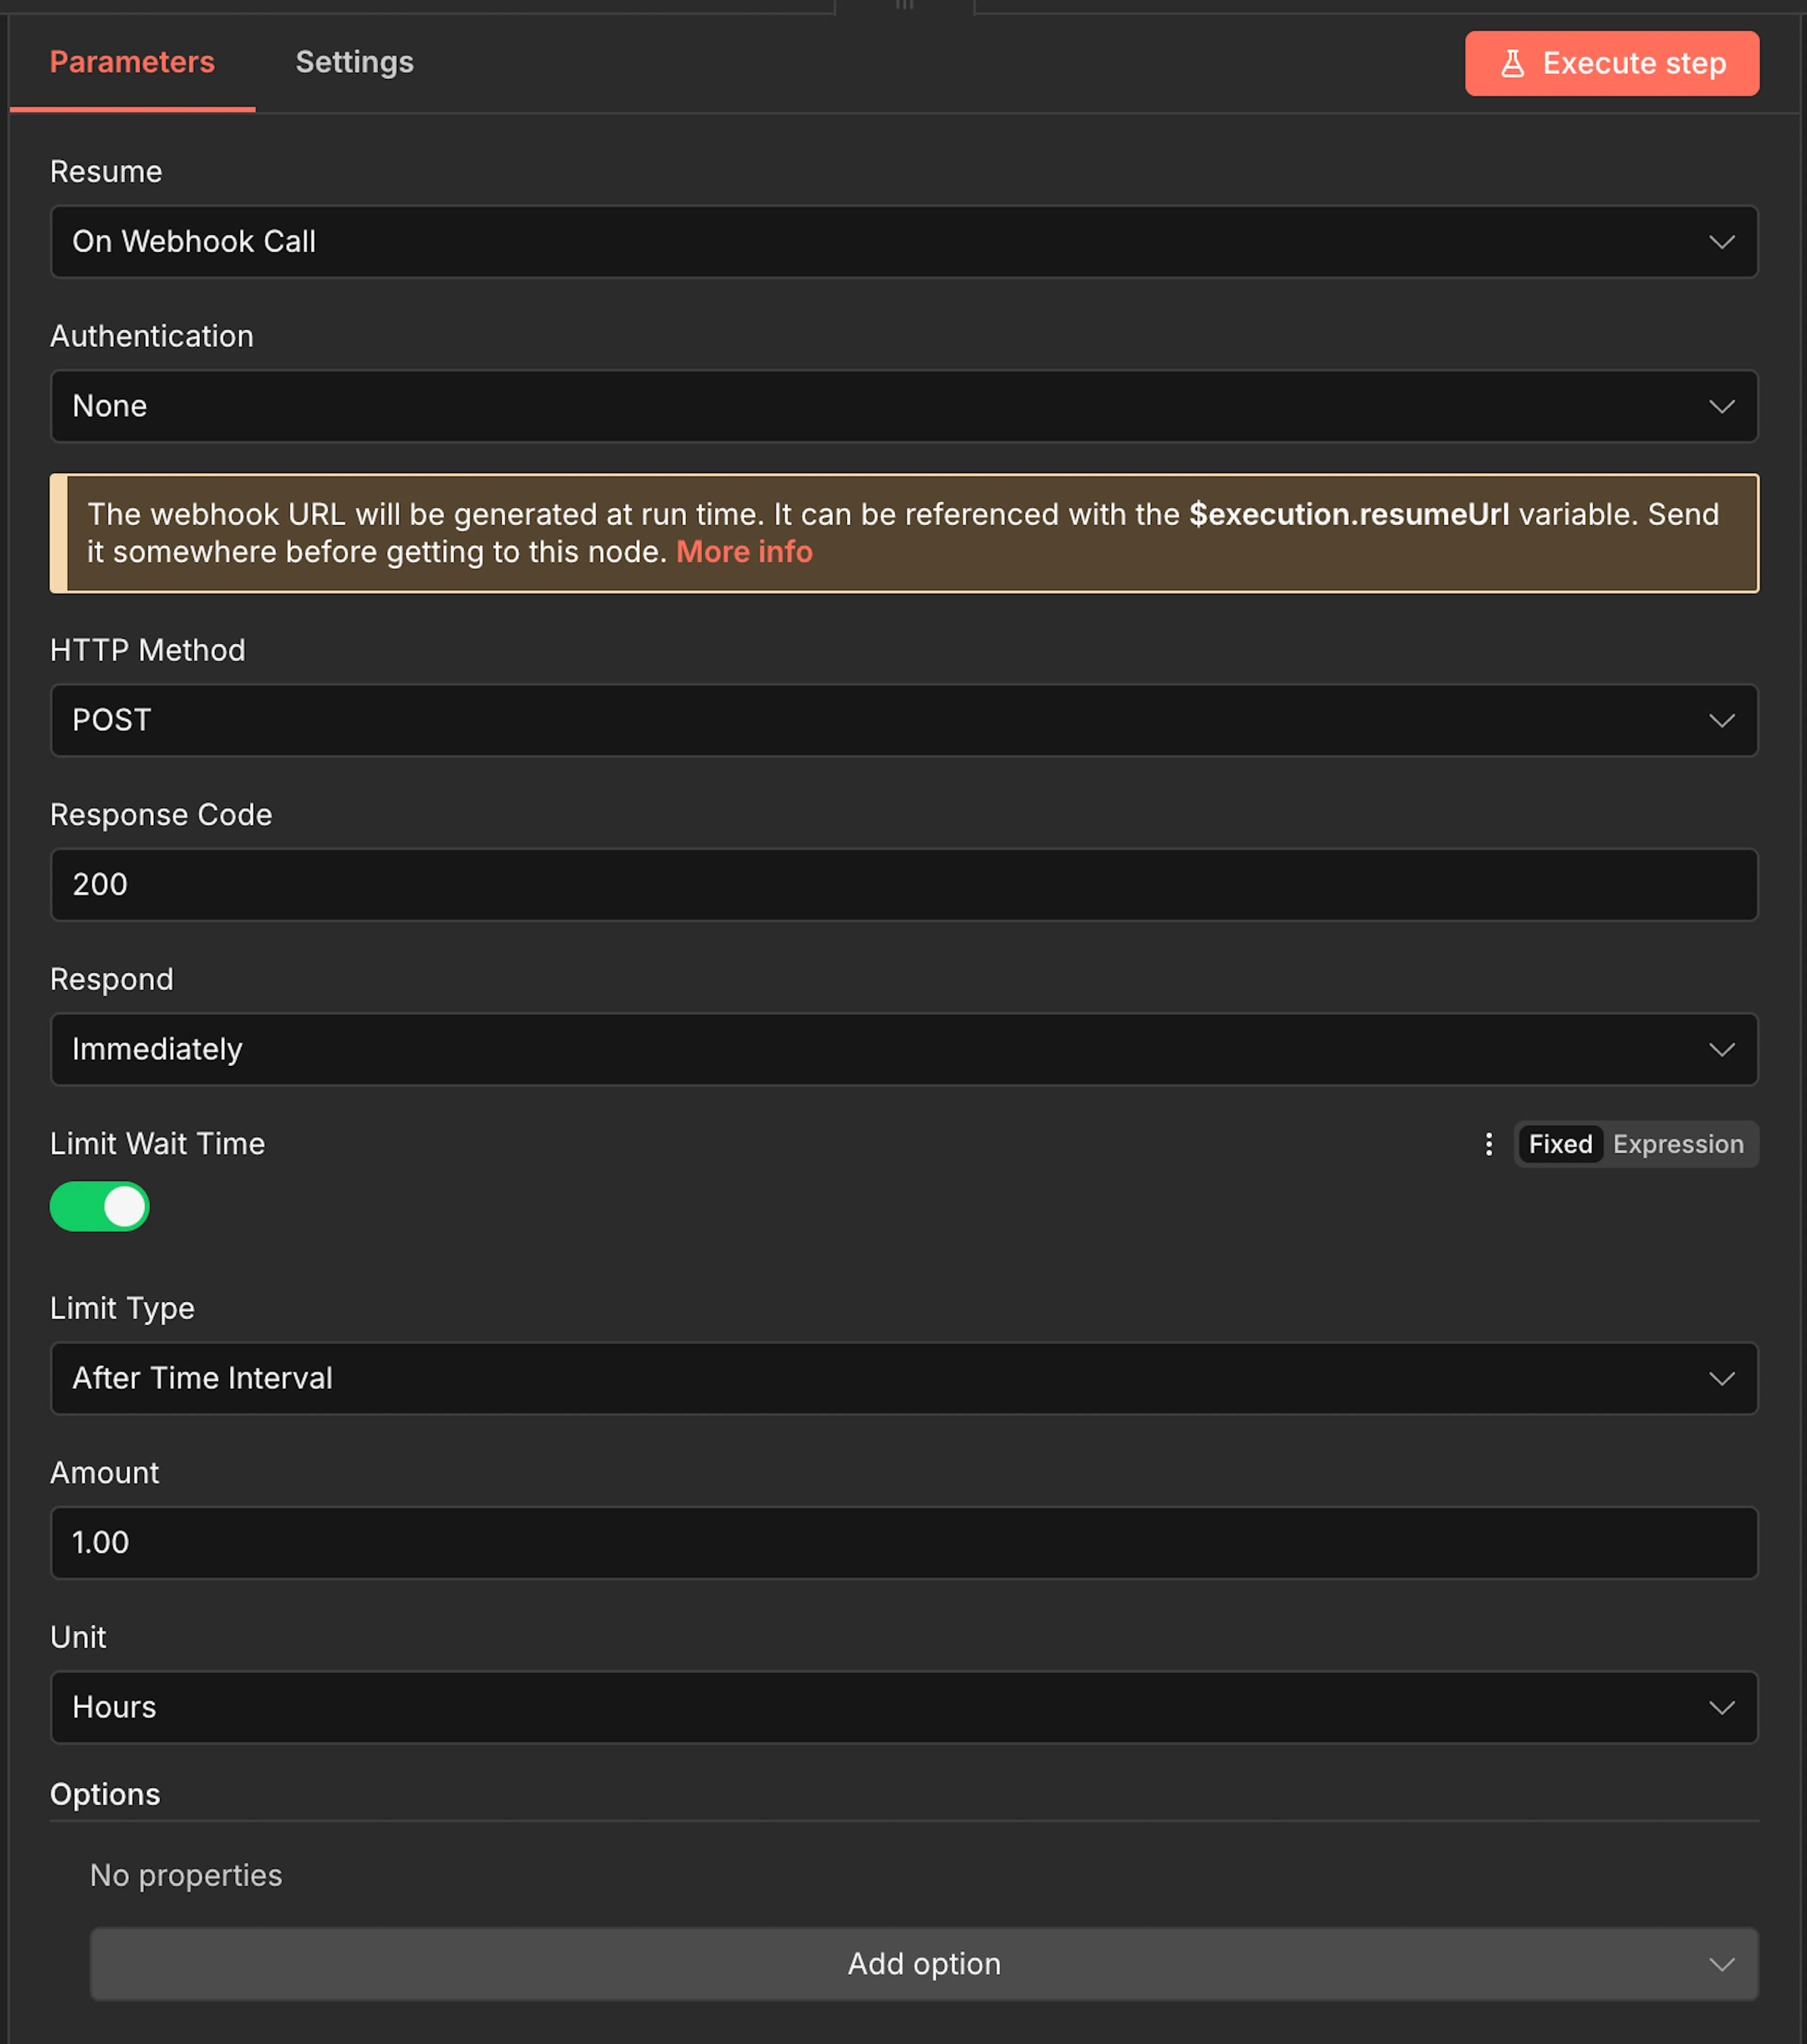
Configure the Wait node:
-
Mode:
On Webhook Call -
The webhook URL will be generated at run time. It can be referenced with the
$execution.resumeUrlvariable. Send it somewhere before getting to the Wait node. More info
-
Step 2: Check the Status with an "If" node
Now we can use the webhook data to direct our workflow after the wait.
-
Add an If node and connect it to the Wait node's output.
-
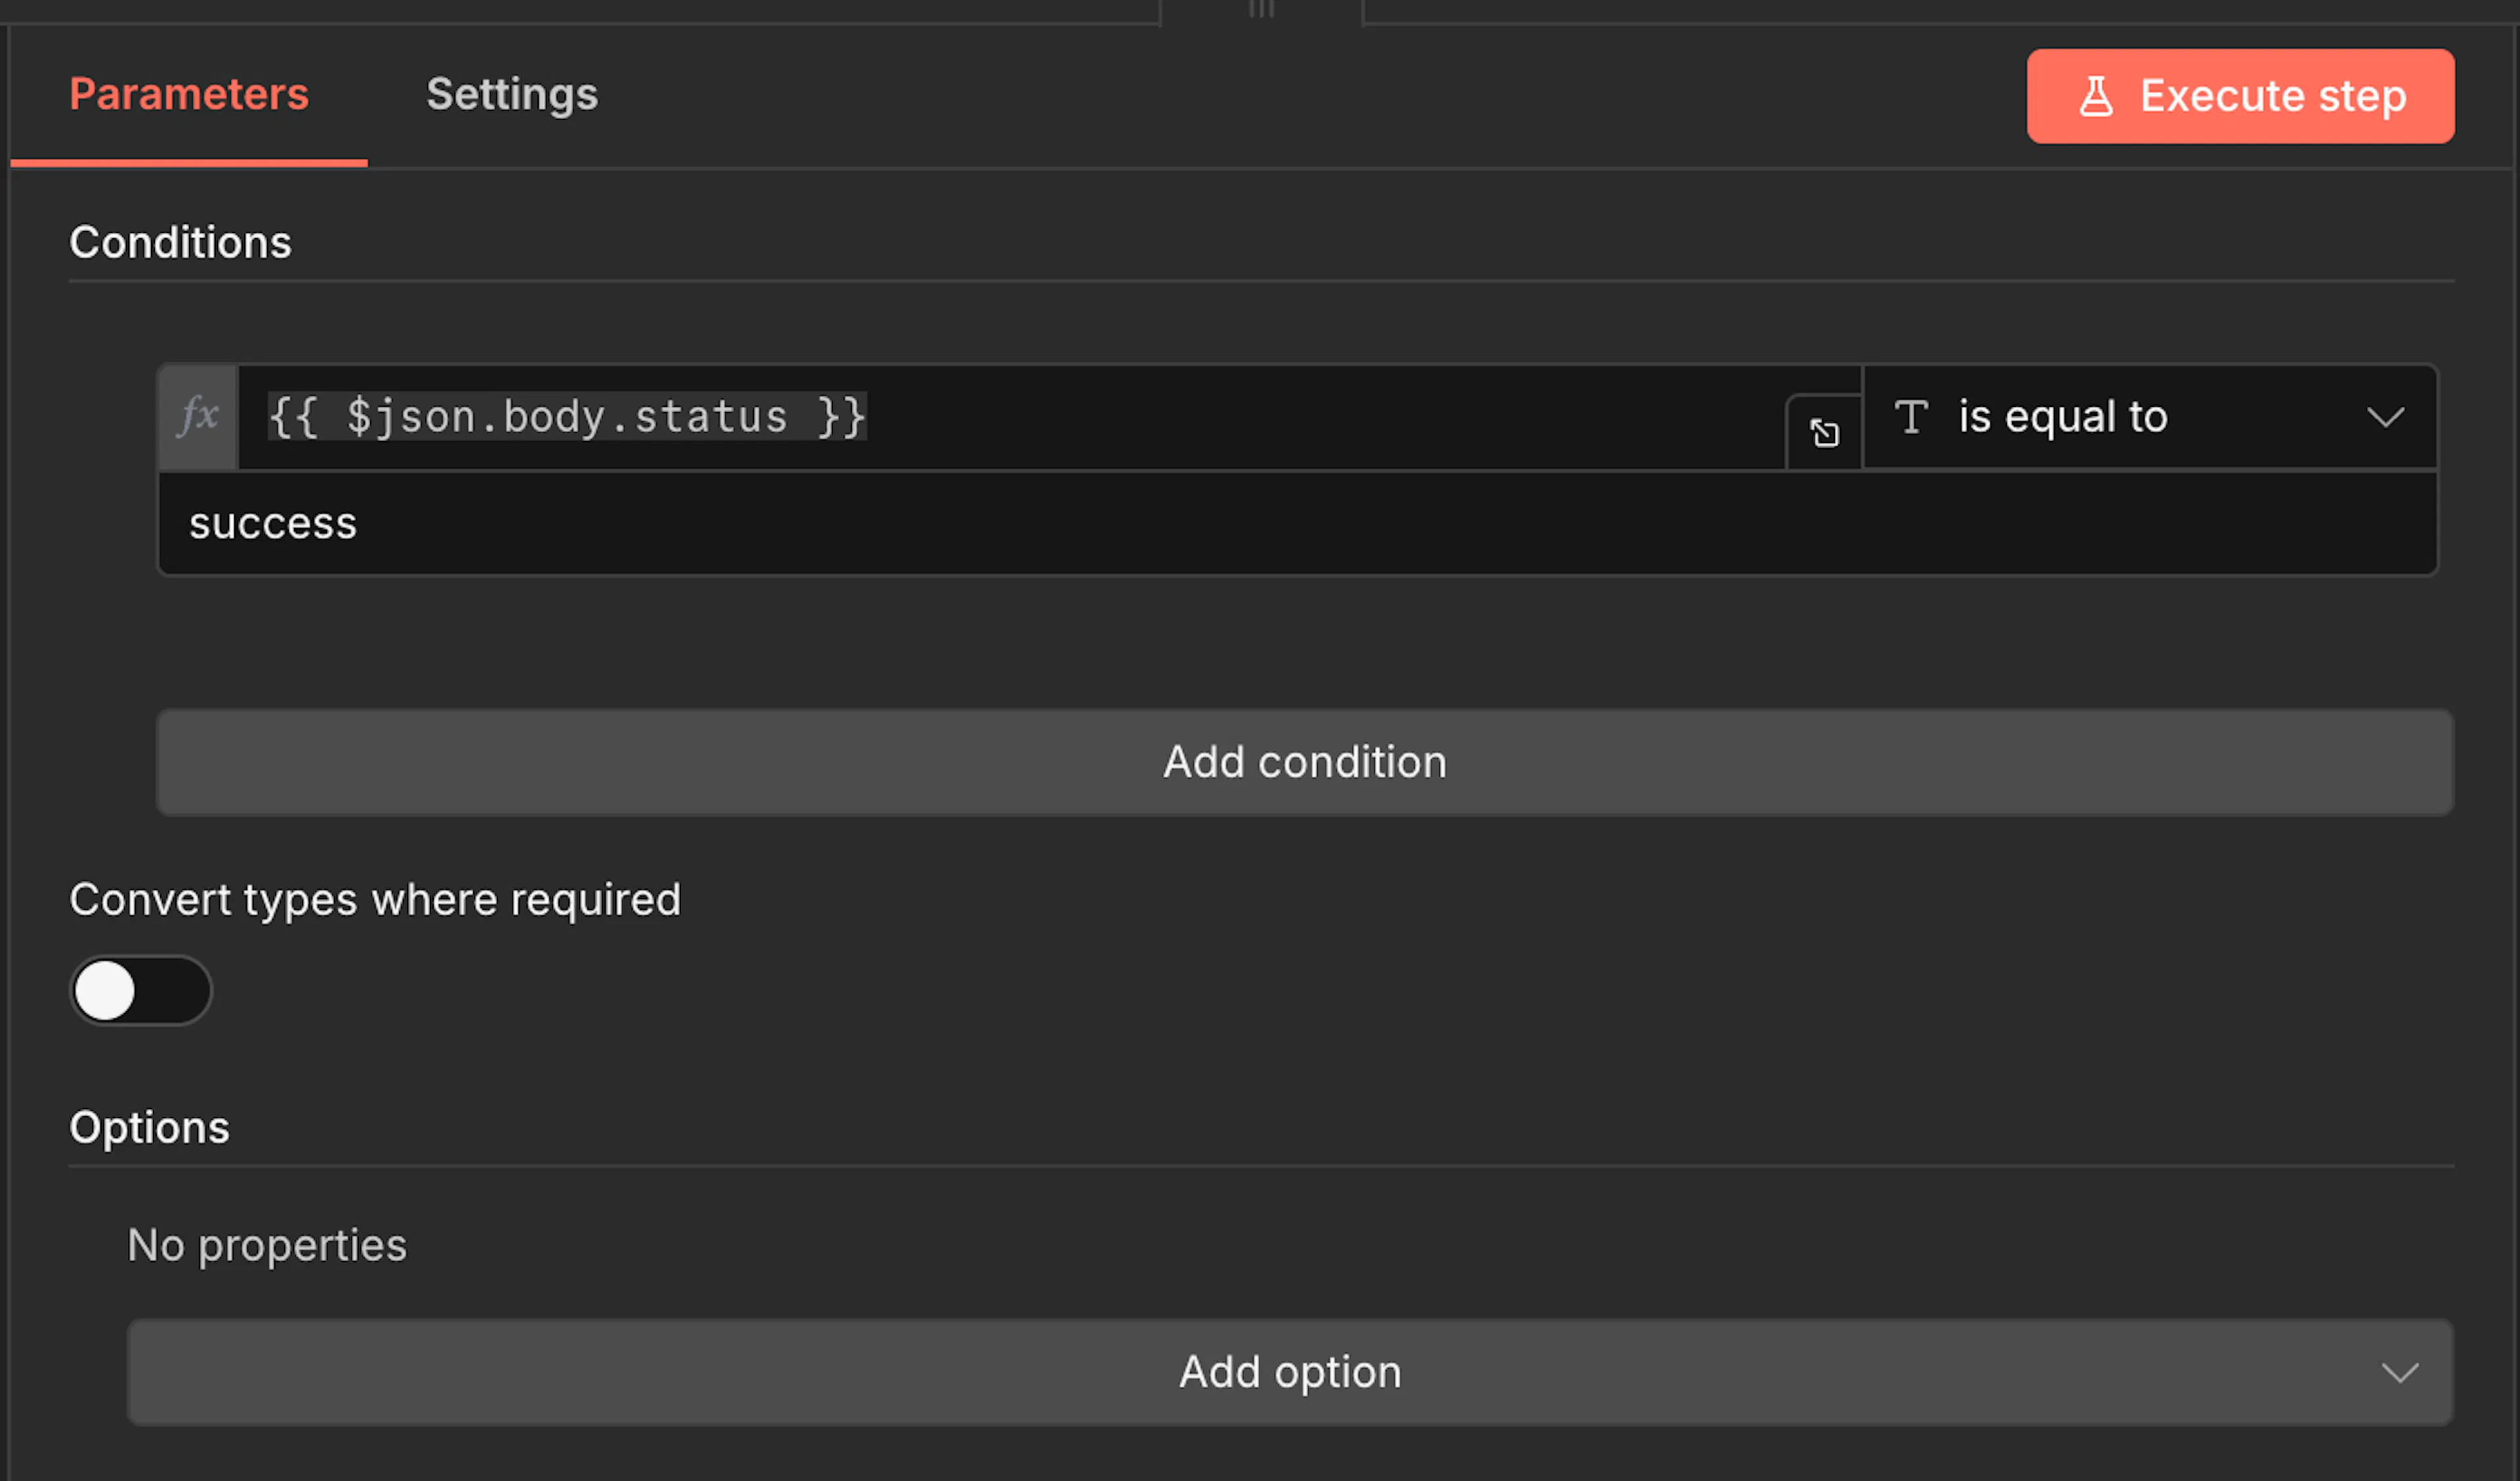
Configure the "If" node to check if the command was successful.
-
Value 1:
{{$json.body.status}} -
Operation:
Equal -
Value 2:
success
-
The true branch will now execute only if the status is success. All other statuses will go to the false branch.
Step 3: Handle the Result and Activate
You can now add further actions based on the result.
-
From the
trueoutput, you could save the results to a database or send a "success" notification. -
From the
falseoutput, you could add another "If" node to check if the status isfailedand then send an error alert.
Part 2: The Command Creator Workflow
Step 2: Configure the HTTP Request Node
-
Add an HTTP Request node.
-
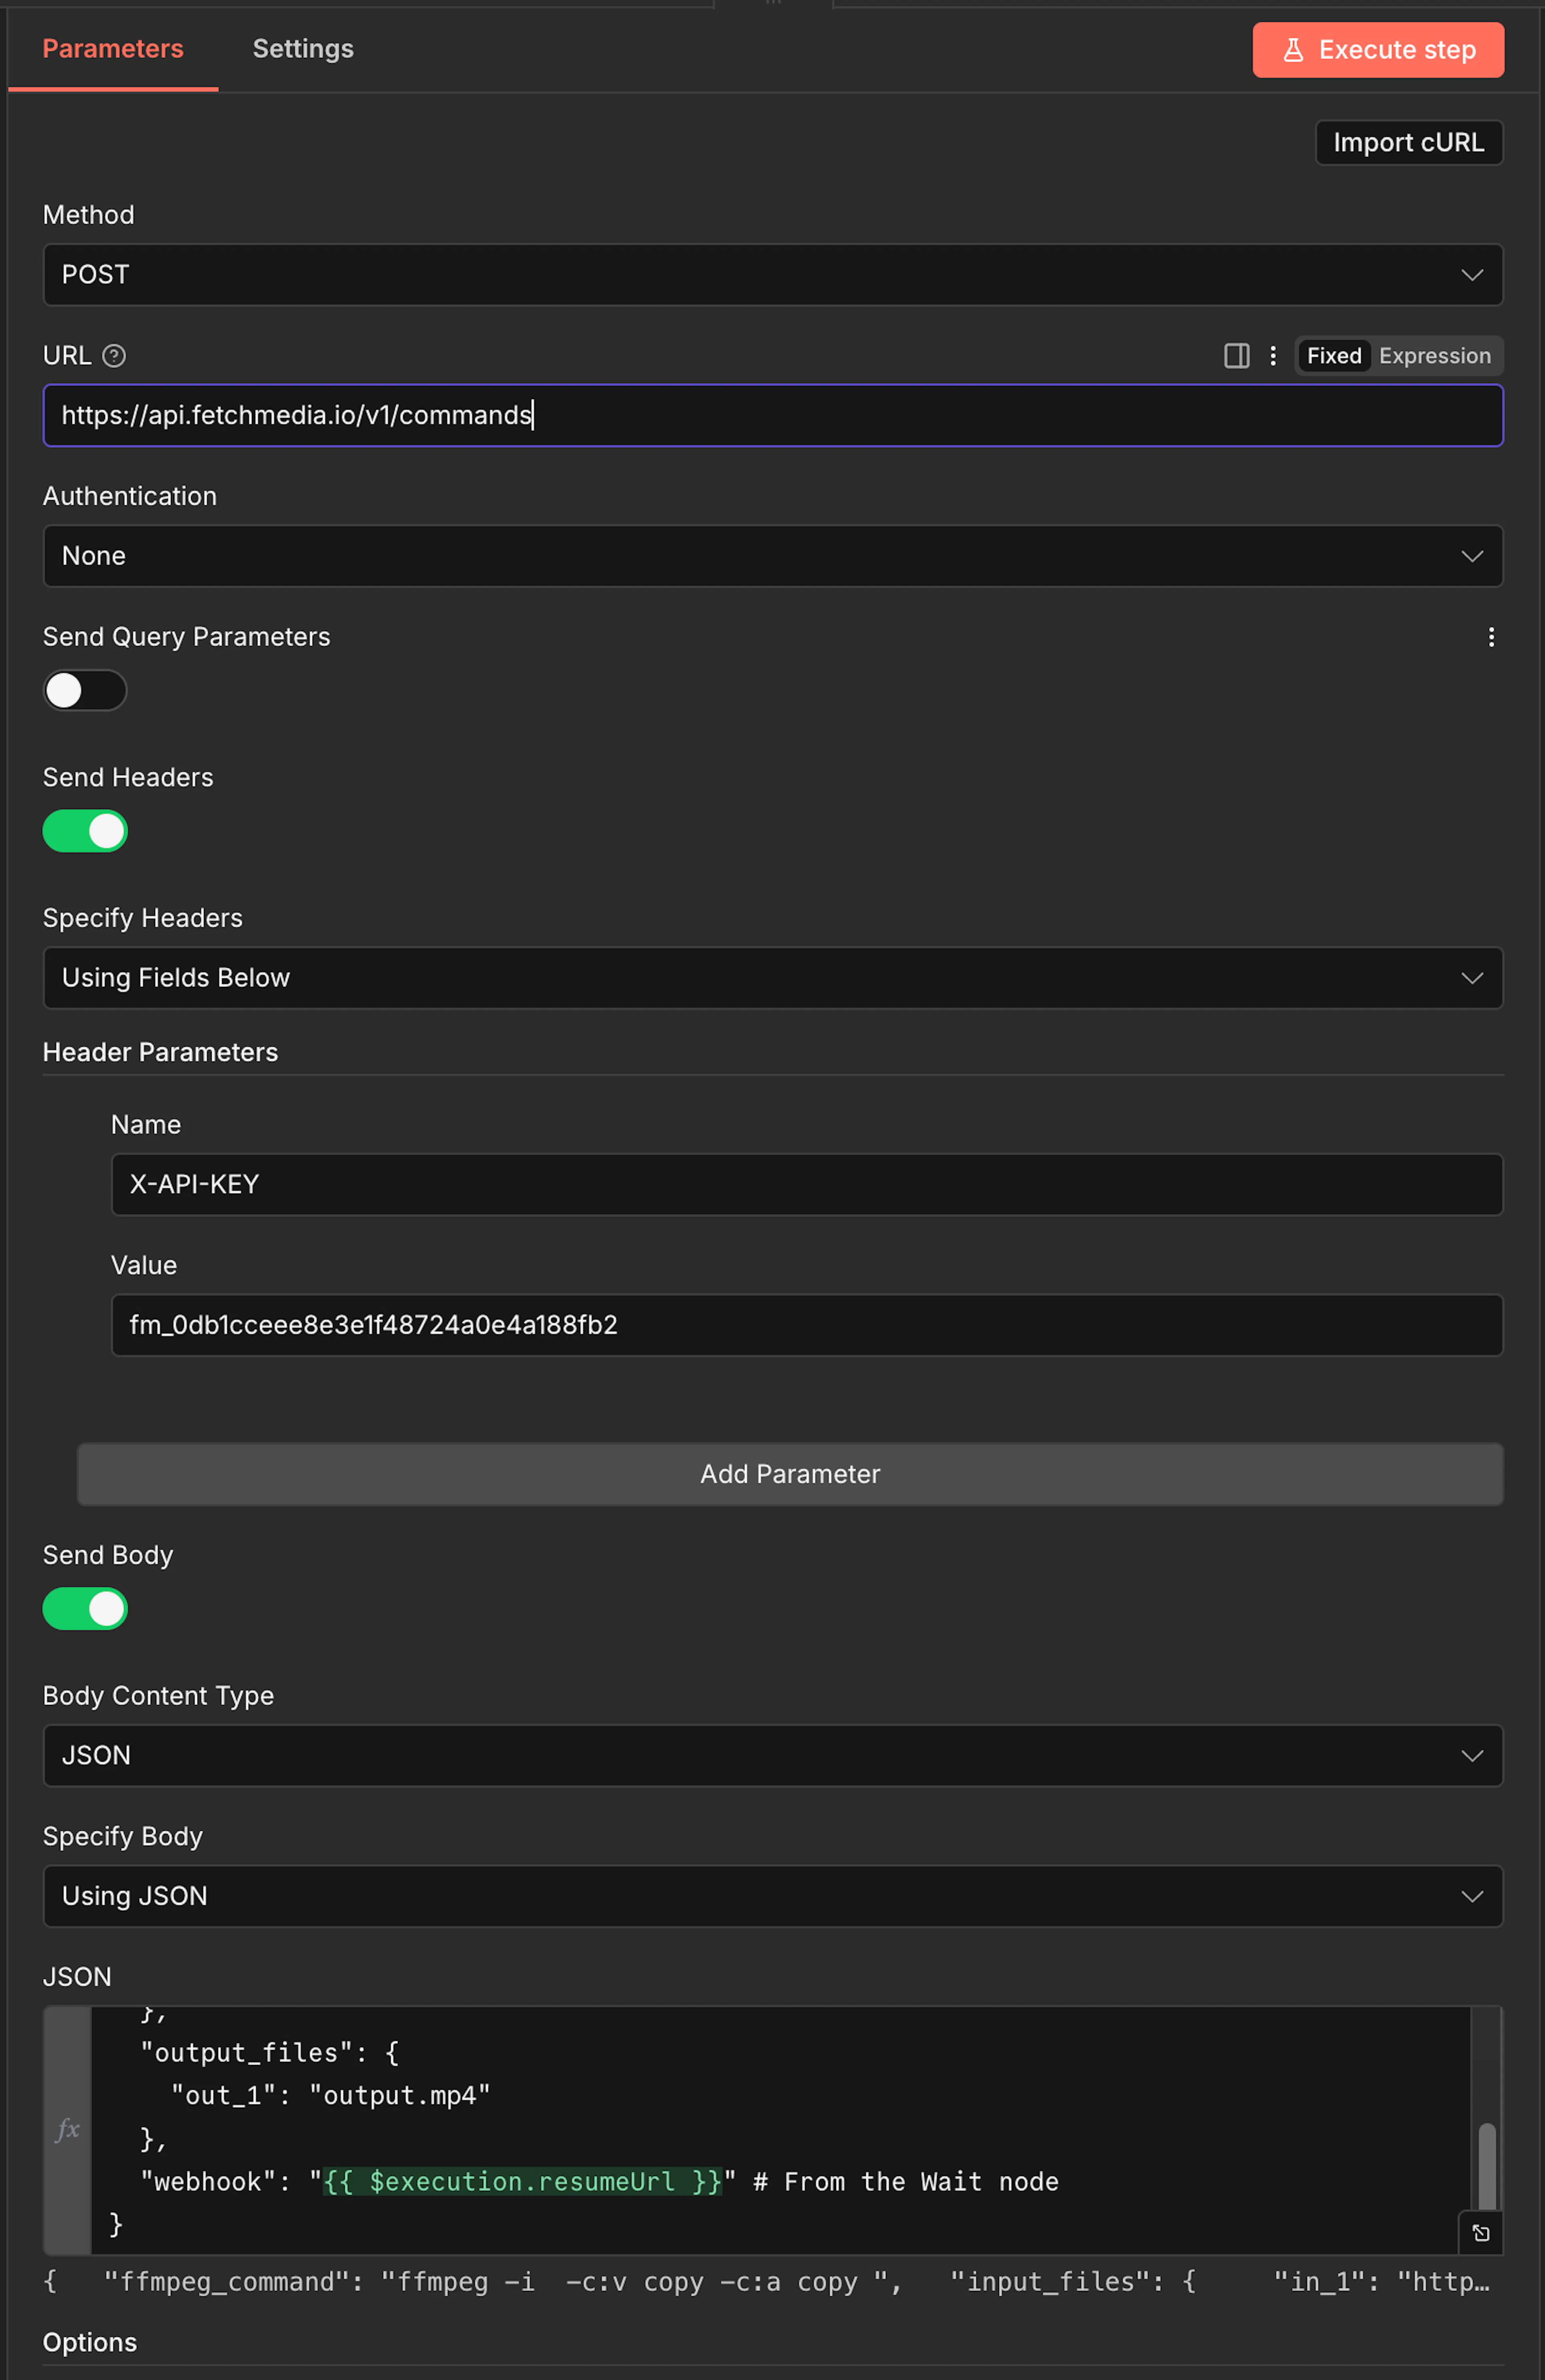
Configure it to create a command:
-
Method:
POST -
URL:
https://api.fetchmedia.io/v1/commands -
Authentication:
Header Auth(Use your FetchMedia API Key credentials). -
Body Content Type:
JSON -
Body:
{
  "ffmpeg_command": "ffmpeg -i {{in_1}} -c:v copy -c:a copy {{out_1}}",
  "input_files": {
    "in_1": "https://www3.cde.ca.gov/download/rod/big_buck_bunny.mp4"
  },
  "output_files": {
    "out_1": "output.mp4"
  },
  "webhook": "{{ $execution.resumeUrl }}" # From the Wait node
}
Keep in mind the
$execution.resumeUrlyou copied from your Wait node in Part 1.
-
Step 3: Run the Workflow
Execute this workflow manually. It will send a request to FetchMedia to create a new command. Once that command finishes processing, FetchMedia will automatically send a notification to your webhook URL, which will trigger the Wait node from part 1 and will contiune the workflow.
You have now successfully set up a webhook-driven process to manage your FetchMedia commands!